Step 18 of 40: Fill Series/Delete Worksheet
This step illustrates how to use the Fill Series command and how to delete a worksheet.
Q: The Account Listing worksheet is protected. What is the password to unprotect it?
A: There are two different levels of protection within Excel workbooks:
- Worksheet protection means that only unlocked cells can be edited.
- Workbook protection prevents you from adding, moving, renaming, or deleting worksheets.
The Account Listing worksheet has worksheet protection applied to keep you going in the right direction. Coversely workbook protection is not enabled, because if it were you would not be able to delete the Account Listing worksheet.
Written description of the slides
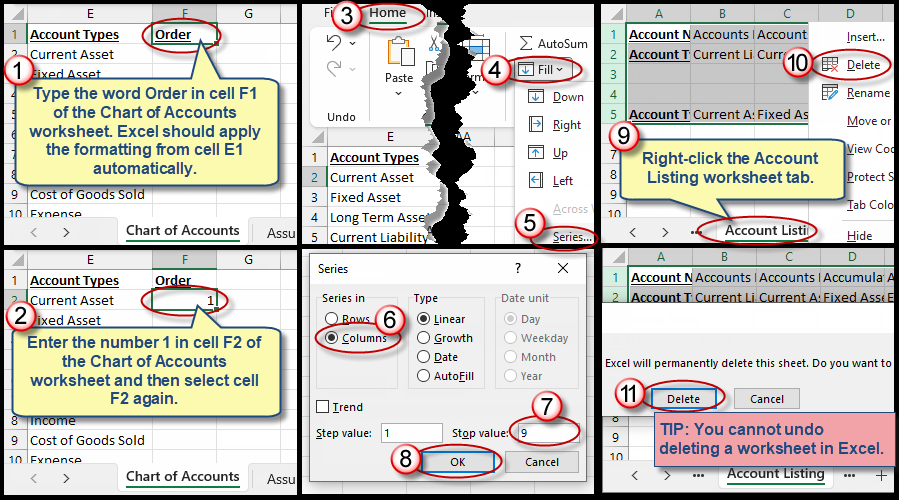
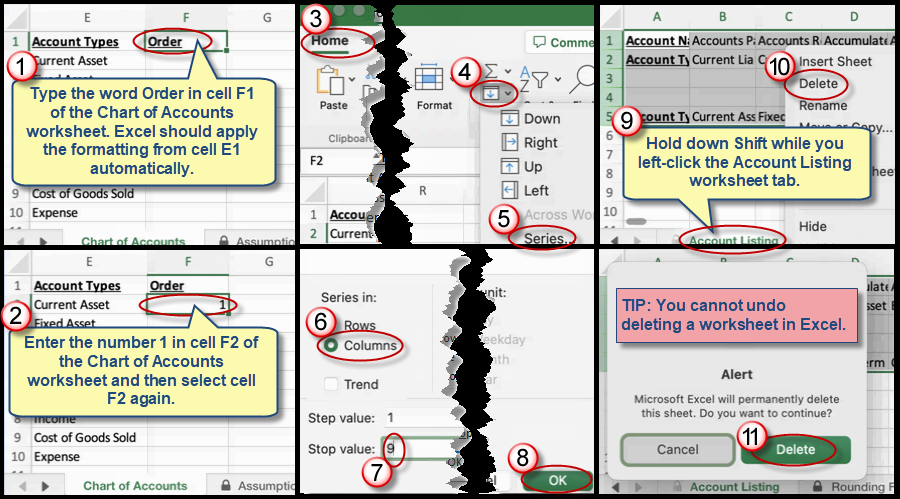
The Fill Series command creates a series of numbers from a seed value that you provide. In this case, you'll enter the number 1 into cell F2, and then select cell F2. Choose Home | Fill | Series, choose Columns, and then set the Stop Value to 9 in this case, and then click OK. Based upon these instructions, Excel creates a series from 1 to 9.
To delete a worksheet, right-click the Account Listing worksheet tab and then choose Delete from the context menu. Click Delete to confirm the deletion.
TIP: You cannot undo deleting a worksheet in Excel, so pause and double-check before choosing the Delete command.
We're here to help
If you're stuck or confused, send a copy of your workbook by way of one of these methods:
• Share: Click the Share command in the upper-right hand corner of the Excel screen, choose Share again, and then share the workbook with support@studentsexcel.com.
• Upload: You can upload a copy of your workbook at www.studentsexcel.com/student-upload.
• Email: You can email your workbook as an attachment to support@studentsexcel.com.
Be sure to listen to the audio portion of the video as you work through the assignment. The presenter elaborates further on what is being presented on screen and will offer tips.