Step 21 of 40: Data Validation
This step illustrates how to use the Data Validation command to restrict the type of data or the values that users enter into a cell.
Written description of the slides
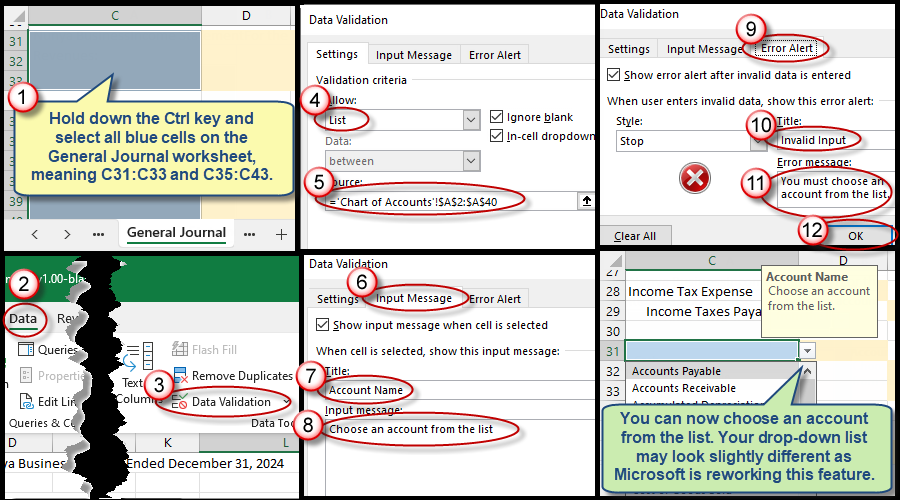
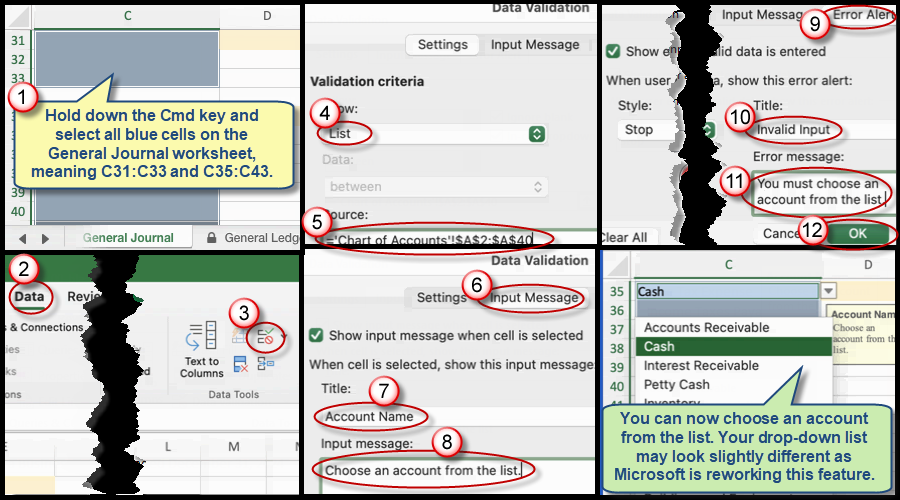
The Data Validation command enables the restriction of the type of data or values can be entered into a cell. In this case, you'll hold down the Ctrl key and select all the blue cells on the General Journal worksheet (C31:C33 and C35:C43) and choose Data | Data Validation. On the Settings tab of the Data Validation dialog box, select List from the Allow drop-down field and type ='Chart of Accounts'!$A$2:$A$40 into the Source field. Next, choose the Input Message Tab, then type Account Name into the Title field and type Choose an account from the list into the Input Message field. Now, choose the Error Alert Tab and type Invalid Input into the Title field and You must choose an account from the list into the Error Message field, and press OK. Based upon these instructions, you will now be able to choose an account from the list.
NOTE: Your drop-down list may look slightly different from the example below as Microsoft is reworking this feature.
We're here to help
If you're stuck or confused, send a copy of your workbook by way of one of these methods:
• Share: Click the Share command in the upper-right hand corner of the Excel screen, choose Share again, and then share the workbook with support@studentsexcel.com.
• Upload: You can upload a copy of your workbook at www.studentsexcel.com/student-upload.
• Email: You can email your workbook as an attachment to support@studentsexcel.com.
Be sure to listen to the audio portion of the video as you work through the assignment. The presenter elaborates further on what is being presented on screen and will offer tips.