Step 35 of 40: Create Closing Entries
This step illustrates how to create Closing Entries to close an account at the end of a fiscal year.
Closing Entries background
Closing entries zero out certain accounts at the end of a fiscal year so that the revenue and expenses for each year can be tracked independently. The accumulated earnings and/or losses of a businesses are stored in the Retained Earnings account.
Closing Entry 1
You will list the accounts and amounts for any revenue accounts. The revenue amounts will appear in the Debit column, and the offset to Retained Earnings will be in the Credit column.
Closing Entry 2
You will debit Retained Earnings for the sum of the expense accounts that had activity. The expense account amounts will be listed as credits.
This step illustrates how to create Closing Entries to close an account.
Regarding recording income taxes, in step 34 you created a journal entry to record income tax expense and income tax liability. This portion of the assignment has minimal guidance because it reinforces concepts that are typically covered in class. Your work is to post the income tax expense and liability to the financial statements. This is done in a similar fashion to the other amounts that you posted. The amounts can be derived from the journal entry that you posted or from the adjusted trial balance.
Written description of the slides
In Step 35, record the following entries:
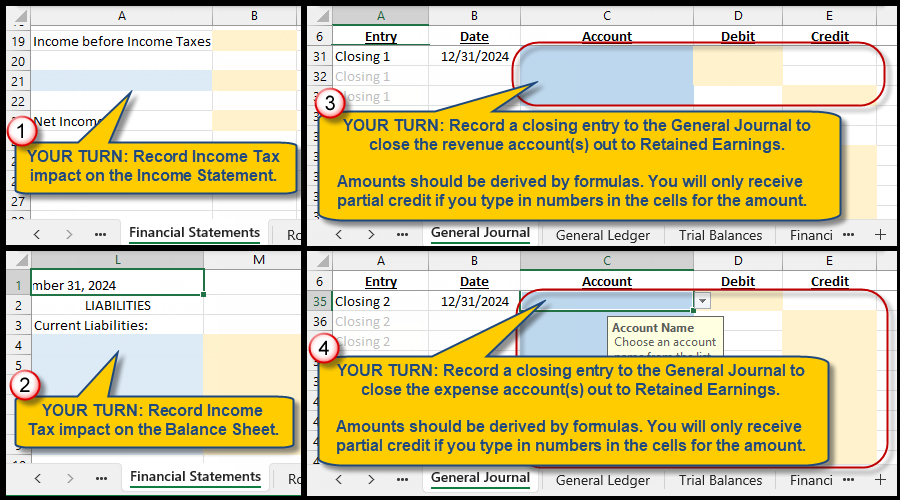
- Record Income Tax impact on the Income Statement.
- Record Income Tax impact on the Balance Sheet.
- Record a closing entry to the General Journal to close the revenue account(s) out to Retained Earnings.
- Record a closing entry to the General Journal to close the expense account(s) out to Retained Earnings.
NOTE: Amounts should be derived by formulas. You will only receive partial credit if you type in numbers in the cells for the
Steps labeled YOUR TURN are reinforcing steps that present opportunities to apply concepts covered earlier in the assignment.
We're here to help
If you're stuck or confused, send a copy of your workbook by way of one of these methods:
• Share: Click the Share command in the upper-right hand corner of the Excel screen, choose Share again, and then share the workbook with support@studentsexcel.com.
• Upload: You can upload a copy of your workbook at www.studentsexcel.com/student-upload.
• Email: You can email your workbook as an attachment to support@studentsexcel.com.
Be sure to listen to the audio portion of the video as you work through the assignment. The presenter elaborates further on what is being presented on screen and will offer tips.